Hi there,

Ever since I started playing with live bacterial culture aka instant yeast in univeristy (as an excuse to procrastinate from studying), I’ve been having a whirlwind of a tasty time.

And recently, I could actually see the back of my fridge. This extra space had me thinking, “Oh! I have enough room to retard some dough!” See where my priorities lie? Yes, always with food! Now we’re on the same page.

My family was running low on bread (we never buy, I make loaves and buns for them regularly). On that occasion, we craved bagels, and without hesitation, I pulled out my Bread Baker’s Apprentice book for P.R’s Bagel recipe. He is the Bread Whisperer, nay, the Bread God if you will.

Anytime I’ve chosen to make his recipes, it’s because he is so thorough with his instructions. You are also in admiration of his passion for baking; it shows in the writing… it’s electric and contagious in the best of ways.

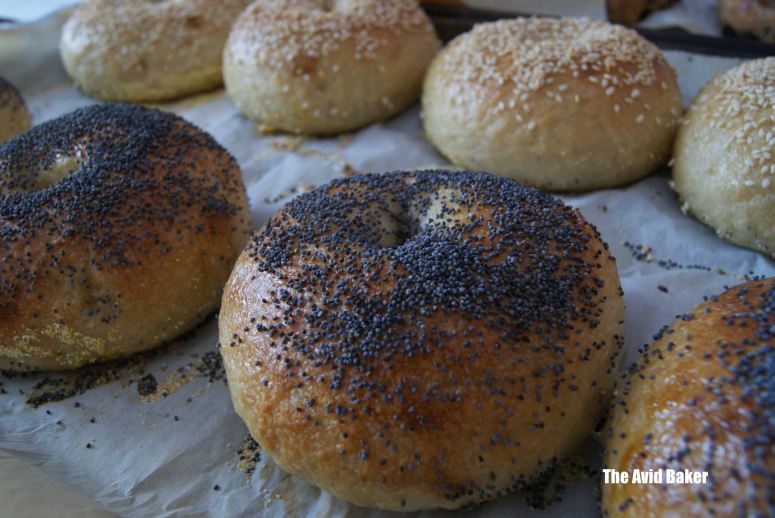
I’ve had impeccable results every time using this bagel recipe. Hot out of the oven, these doughnut shaped delights need no additional adornments– yes, they are that sensational.

They have a crusty exterior and a soft, chewy interior. After that, they are still pretty rocking, but can always be jazzed up with cream cheese, butter, aged cheddar cheese… whatever you fancy really.

This recipe is from Peter Reinhart (The Bread Baker’s Apprentice) via Smitten Kitchen
My suggestions/ comments are in.. you guessed it, italics
Peter Reinhart’s Bagels
Ok, I admit, there’s a boatload of instructions. But definitely, it’s in your best interest to read everything before you invest the time and effort to making these bagels. I will tell you one thing though, they are really worth it. The only caveat, you won’t be able to return to the store bought variety ever again– they would just depress you like they do me.
Ingredients:
Sponge
1 teaspoon instant yeast (works much better than active dry yeast)
4 cups unbleached high-gluten or bread flour (high gluten flour is hella expensive. After trying both types of flour, while high gluten is admittedly superior, the latter still delivers a killer bagel: flavour and texture wise)
2 1/2 cups water, room temperature (I used water that was boiled to remove impurities and kill off any nasty bacteria. I used the water when it was at room temp)
Dough
1/2 teaspoon instant yeast
3 3/4 cups unbleached high-gluten or bread flour
2 3/4 teaspoons salt (I used fine sea salt here)
2 teaspoons malt powder or 1 tablespoon dark or light malt syrup, honey, or brown sugar (I used malt syrup which you can find at your local bulk food store)
To Finish
1 tablespoon baking soda
Cornmeal or semolina flour for dusting
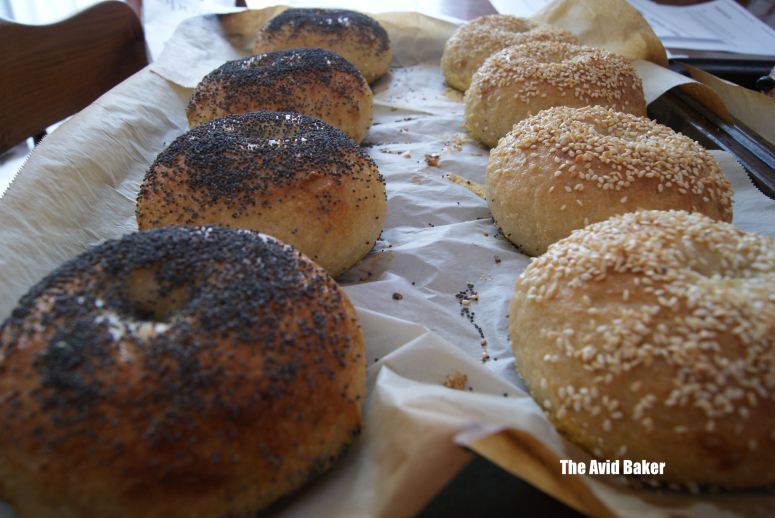
Sesame seeds, poppy seeds, kosher salt, rehydrated dried minced garlic or onions, or chopped onions that have been tossed in oil (optional)
Directions:
1. Day one: To make the sponge, stir the yeast into the flour in a 4-quart mixing bowl. Add the water, whisking or stirring only until it forms a smooth, sticky batter (like pancake batter). Cover the bowl with plastic wrap and leave at room temperature for approximately 2 hours, or until the mixture becomes very foamy and bubbly. It should swell to nearly double in size and collapse when the bowl is tapped on the countertop.
2. To make the dough, in the same mixing bowl (or in the bowl of an electric mixer), add the additional yeast to the sponge and stir. Then add 3 cups of the flour and all of the salt and malt. Stir (or mix on low speed with the dough hook) until the ingredients for a ball, slowly working in the remaining 3/4 cup flour to stiffen the dough.
3. Transfer the dough to the counter and knead for at least 10 minutes (or for 6 minutes by machine). The dough should be firm, stiffer than French bread dough, but still pliable and smooth. There should be no raw flour – all ingredients should be hydrated. The dough should pass the windowpane test and register 77 to 71 degrees F. If the dough seems to dry and rips, add a few drops of water and continue kneading. If the dough seems tacky or sticky, add more flour to achieve the stiffness required. The kneaded dough should feel satiny and pliable but not be tacky.
4. Immediately divide the dough into 4 1/2 ounce pieces for standard bagels, or smaller if desired (2.25 oz for the miniature ones). Form the pieces into rolls. (I strongly recommend weighing them if you can. This will ensure the bagels bake evenly)
5. Cover the rolls with a damp towel and allow them to rest for approximately 20 minutes.
6. Line 2 sheet pans with baking parchment and mist lightly with spray oil. Proceed with one of the following shaping methods:
Method 1: Poke a hole in a ball of bagel dough and gently rotate your thumb around the inside of the hole to widen it to approximately 2 1/2 inches in diameter (half of this for a mini-bagel). The dough should be as evenly stretched as possible (try to avoid thick and thin spots.)
Method 2: Roll out the dough into an 8-inch long rope. (This may require rolling part of the way and resting if the pieces are too elastic and snap back, in which case, allow them to rest for 3 minutes and then extend them again to bring to full length. Wrap the dough around the palm and back of your hand, between the thumb and forefinger, overlapping the ends by several inches. Press the overlapping ends on the counter with the palm of your hand, rocking back and forth to seal.
7. Place each of the shaped pieces 2 inches apart on the pans (1-inch space for the minis). Mist the bagels very lightly with the spray oil and slip each pan into a food-grade plastic bag, or cover loosely with plastic wrap. Let the pans sit at room temperature for about 20 minutes.
8. Check to see if the bagels are ready to be retarded in the refrigerator by using the “float test”. Fill a small bowl with cool or room-temperature water. The bagels are ready to be retarded when they float within 10 seconds of being dropped into the water. Take one bagel and test it. If it floats, immediately return the tester bagel to the pan, pat it dry, cover the pan, and place it in the refrigerator overnight (it can stay in the refrigerator for up to 2 days). If the bagel does not float. Return it to the pan and continue to proof the dough at room temperature, checking back every 10 to 20 minutes or so until a tester floats. The time needed to accomplish the float will vary, depending on the ambient temperature and the stiffness of the dough.
9. The following day (or when you are ready to bake the bagels), preheat the oven to 500 degrees F with the two racks set in the middle of the oven. Bring a large pot of water to a boil (the wider the pot the better), and add the baking soda (I also add a tablespoon of light brown sugar to the poaching liquid. I feel it contributes to better caramelization of the bagels while they’re in the oven). Have a slotted spoon or skimmer nearby.
10. Remove the bagels from the refrigerator and gently drop them into the water, boiling only as many as comfortably fit (they should float within 10 seconds). After 1 minutes flip them over rand boil for another minute. If you like very chewy bagels, you can extend the boiling to 2 minutes per side. (I only boiled them for 30 seconds on each side. I took this tip from Baking Illustrated’s bagel recipe). While the bagels are boiling, sprinkle the same parchment-lined sheet pans with cornmeal or semolina flour. (If you decide to replace the paper, be sure to spray the new paper lightly with spray oil to prevent the bagels from sticking to the surface.) If you want to top the bagels, do so as soon as they come out of the water. You can use any of the suggestions in the ingredients list or a combination.
11. When all the bagels have been boiled, place the pans on the 2 middle shelves in the oven. Bake for approximately 5 minutes, then rotate the pans, switching shelves and giving the pans a 180-degree rotation. (If you are baking only 1 pan, keep it on the center shelf but still rotate 180 degrees.) After the rotation, lower the oven setting to 450 degrees F and continue baking for about 5 minutes, or until the bagels turn light golden brown. You may bake them darker if you prefer. (It actually took me 9-10 minutes until they were golden brown)
12. Remove the pans from the oven and let the bagels cool on a rack for 15 minutes or longer before serving.
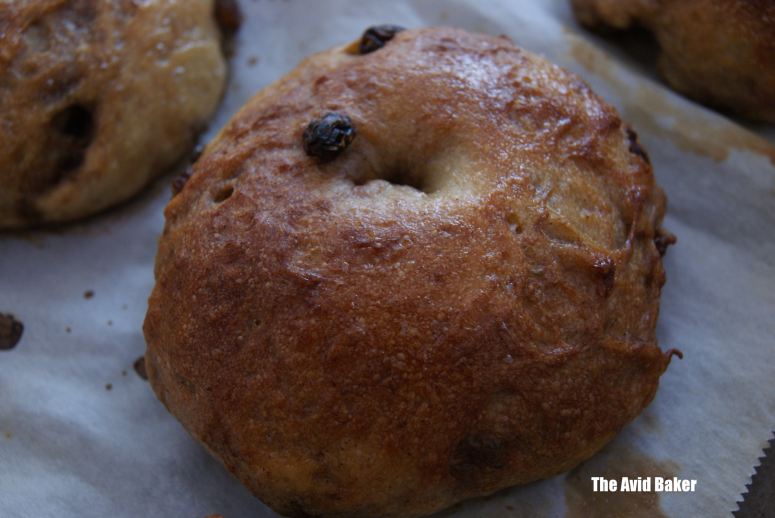
To make Cinnamon Raisin Bagels instead: For cinnamon raisin bagels, increase the yeast in the final dough to 1 teaspoon, and add 1 tablespoon of ground cinnamon and 5 tablespoons of granulated sugar to the final dough. Rinse 2 cups of loosely packed raisins with warm water to wash off surface sugar, acid, and natural wild yeast. Add the raisins during the final 2 minutes of mixing. Proceed as directed, but do not top the bagels with any garnishes. When they come out of the oven and are still hot, you can brush the tops with melted butter and dip them in cinnamon sugar to create a cinnamon-sugar crust, if desired.
Yield: 12 very large bagels or 24 miniature bagels

Awesome recipe (at least the write up, haven’t tried it yet 🙂 Question for you, what is the “windowpane test”?
By the way, I have also been baking my own bread for the past 6 months or so. Once you get in the habit of it, it’s quite easy and a good way to relax after coming back from work. I like hearty whole-wheat/rye breads. My local grocery store bakery actually has a very good selection of artisan breads but they are quite expensive. by baking the bread at home, I can save at least 2 dollars per loaf.
Thanks!
Hi Lubos,
It’s great to hear that you’ve found such enjoyment in bread baking. I also agree that it is very therapeutic and calming. There’s nothing more rewarding (and makes you feel so proud!) than slicing a piece of your own bread rather than purchasing costly artisan ones from the grocer.
The windowpane test is for determining whether your dough has enough gluten developed in it. This is achieved through proper kneading. If you’ve worked the dough for the recipe’s specified time and want to check if the dough’s gluten has been developed, simply pinch off a ping-pong ball sized portion of dough. Using both your hands, stretch this dough from all sides to a thin membrane (as if you were stretching pizza dough). If you can stretch it to a paper-thin state without it tearing, and it is translucent (as in thin enough to practically see through like a windowpane– hence the name), then your dough’s gluten has been adequately developed and you can proceed with the recipe.
Hope this helps.
Happy Baking!
Thanks! I didn’t know this test had a name. By the way, this is in a way similar to how you make a strudel. The dough needs to be stretchy enough so you can stretch it out, by hand, to become transparent all over. You typically start with something about the size of a sheet of paper and stretch it to the size of a large kitchen table. At least that’s what I’ve seen in photos. I haven’t tried making one from scratch yet.
You’re welcome!
Oh I am familiar with strudel, I adore eating it (classic apple- cinnamon walnut is a favourite of mine). And yes, I am aware of the painstaking efforts that go into making the dough. It’s quite amazing to see how those bakers have a world of patience with such a fickle pastry. In some cases, I feel that it is more intimidating than making danishes and croissants. I’ve made both before with (surprisingly) minimal hassles.
These bagels looks really amazing. I would love to tried all of them for breakfast 🙂
Thanks for the recipe 🙂
You’re welcome! Happy Baking.